Heat Embossing onto Vellum

I had a lot of fun this weekend at an online retreat with Brandy's Cards. One of the tutorials was heat embossing with white embossing powder onto vellum. I made three cards using the tutorial at the retreat but all of my cards are very different because the stamp sets are the ones I have and not the ones used by Brandy. So for example in the card above I stamped the butterfly stamp Butterfly Brilliance onto a piece of vellum using versa mark ink and then sprinkled on white embossing powder and heat it with my heat tool. The once dry I cut the image out using the co-ordinating dies from Stampin' Up and this gave me 6 butterflies which I then coloured on the back using blender pens. I found the darker colours worked the best and shone through the most. You don't see the back - so it is very forgiving technique if your colouring isn't very good! Following Brandy's lead I also decorated inside the card and made a matching envelope. I think its going to be a thing!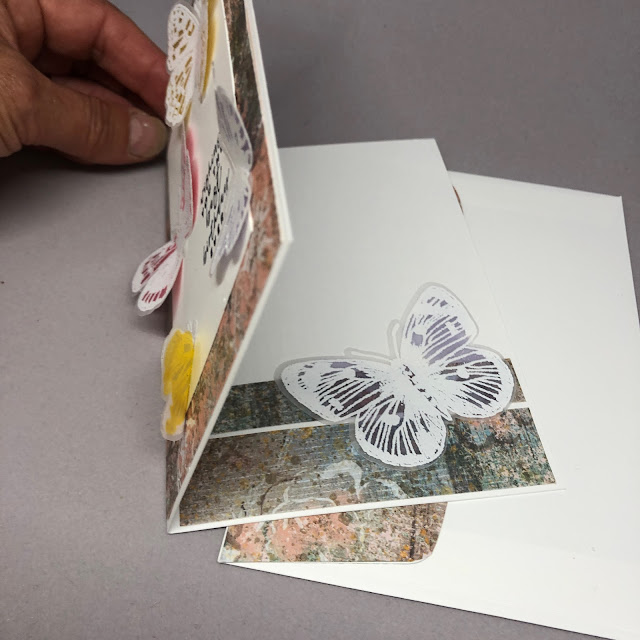
Another card I used my new Holly images from the stamp set called Leaves of Holly , this is such a pretty set and the holly and berries went well with the technique. It works best with images with space to colour at the back. I don't have a lot of these in my collection of 19 stamp sets, but you may have more luck!


I have just posted podcast number 5 , which includes a look at these cards, some of my latest knitting and sewing projects and an update including some filming of our ferret baby which we are having to hand rear and is causing some sleepless nights. We hope she pulls through in the meantime its night feeding every 3 hours until she is more established and onto some solids!. CLICK HERE to watch.

Love JoP x


Comments
Post a Comment
Thank you for taking the time to comment, I appreciate the feedback. Jop x