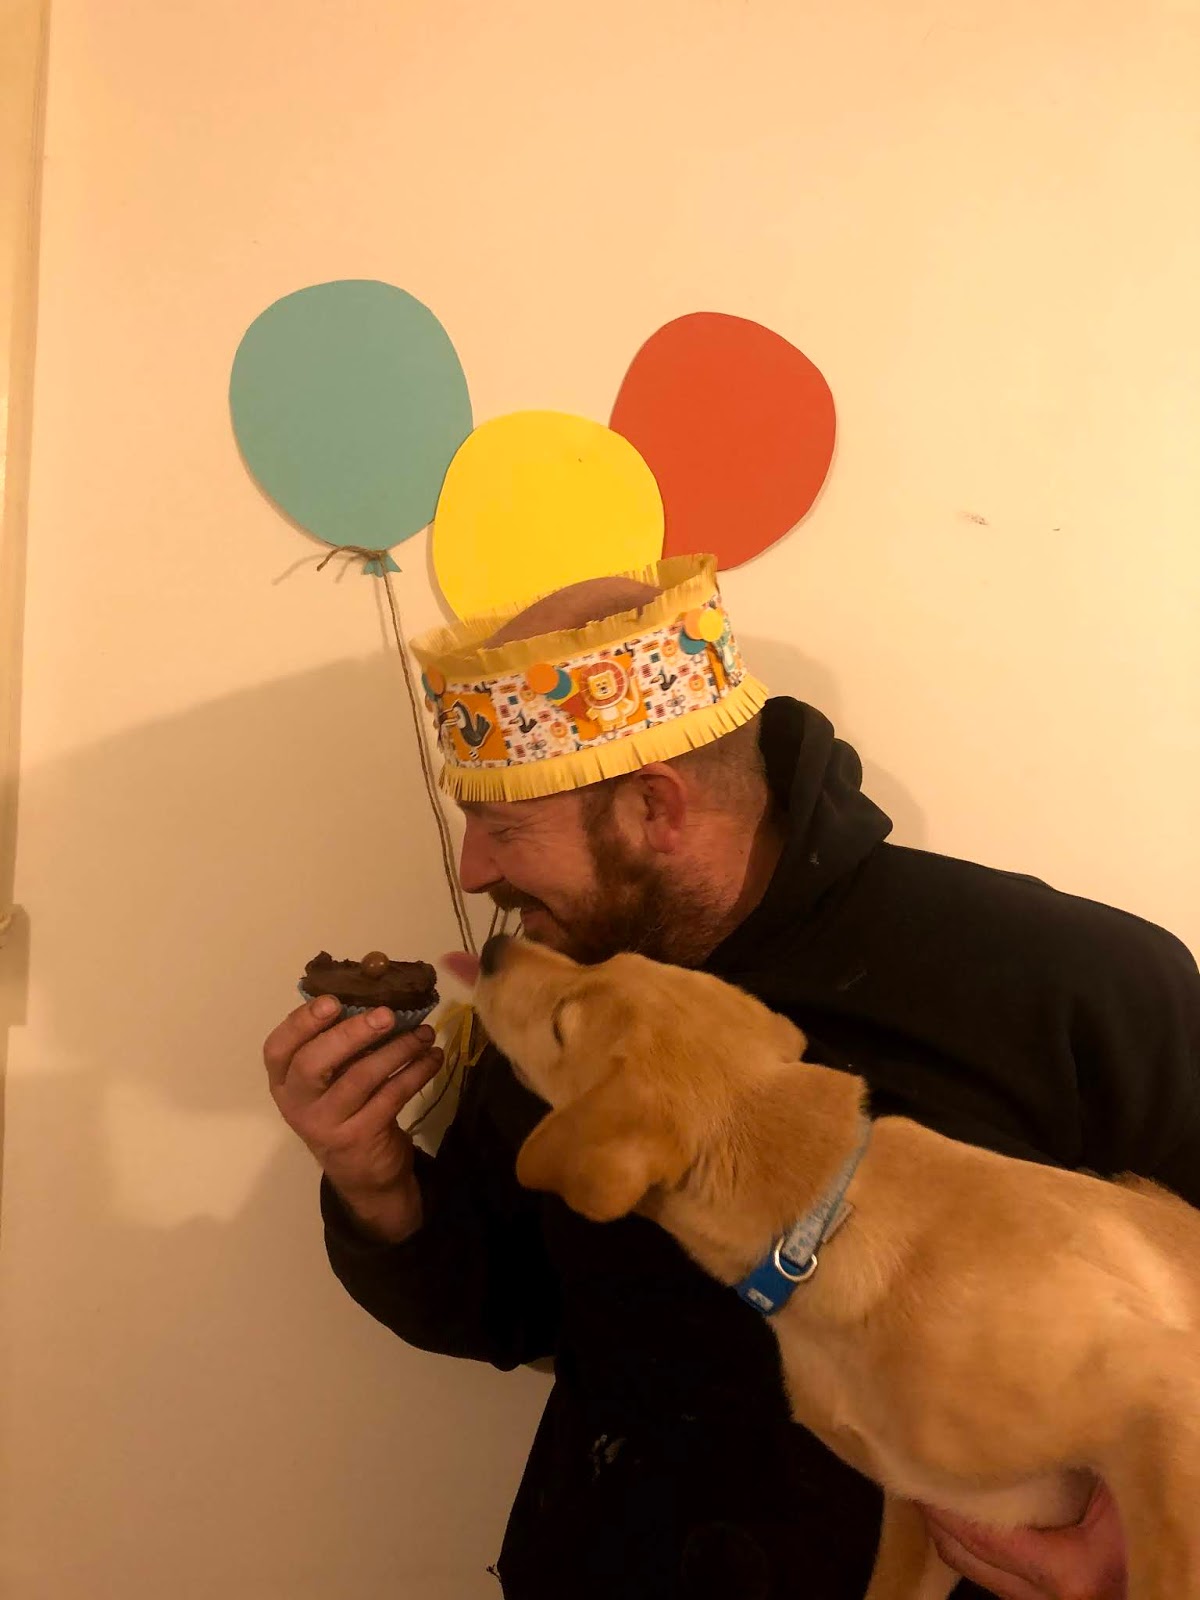
Cake Frill

I was never very good at icing cakes so I often make a cake frill to cheer up a cake. I'm quite fond of cake bunting also (but that might be another project to show you on another day!)
Here is one I made using the Birthday Buddies stamp set and designer series papers.
I cut along a piece of daffodil delight cardstock about 2cm in on each edge using some scissors I bought from Stampin up that cut a few fringes at the same time. You could also use chive snips as these are similar - my top tip - if using special bring scissors or just the two bladed kind is to score a line up to where your cut will be - this helps you to ensure the fringe is nice and even. I have not given dimensions because each cake is different and you will size according to your own size cake.
When you make the cake frill it is likely you will need to glue one or even two pieces of 12 x 12 card and paper together in order to reach around your cake. I needed exactly two lengths of card and paper from mine. Instead of sticking it to meet at each end though I glued it as above as this made it easier to do up around the cake and to take off afterwards - I only needed two dimensionals to bring it together on the day. Some people 'glue' the frill with spare icing but I thought maybe I could reuse this one if it didn't get too sticky. You could line it with some grease proof paper or baking sheet to be sure!


This photo is showing how I fixed the overlapping paper.

You could also you it as a party hat!!!


Comments
Post a Comment
Thank you for taking the time to comment, I appreciate the feedback. Jop x