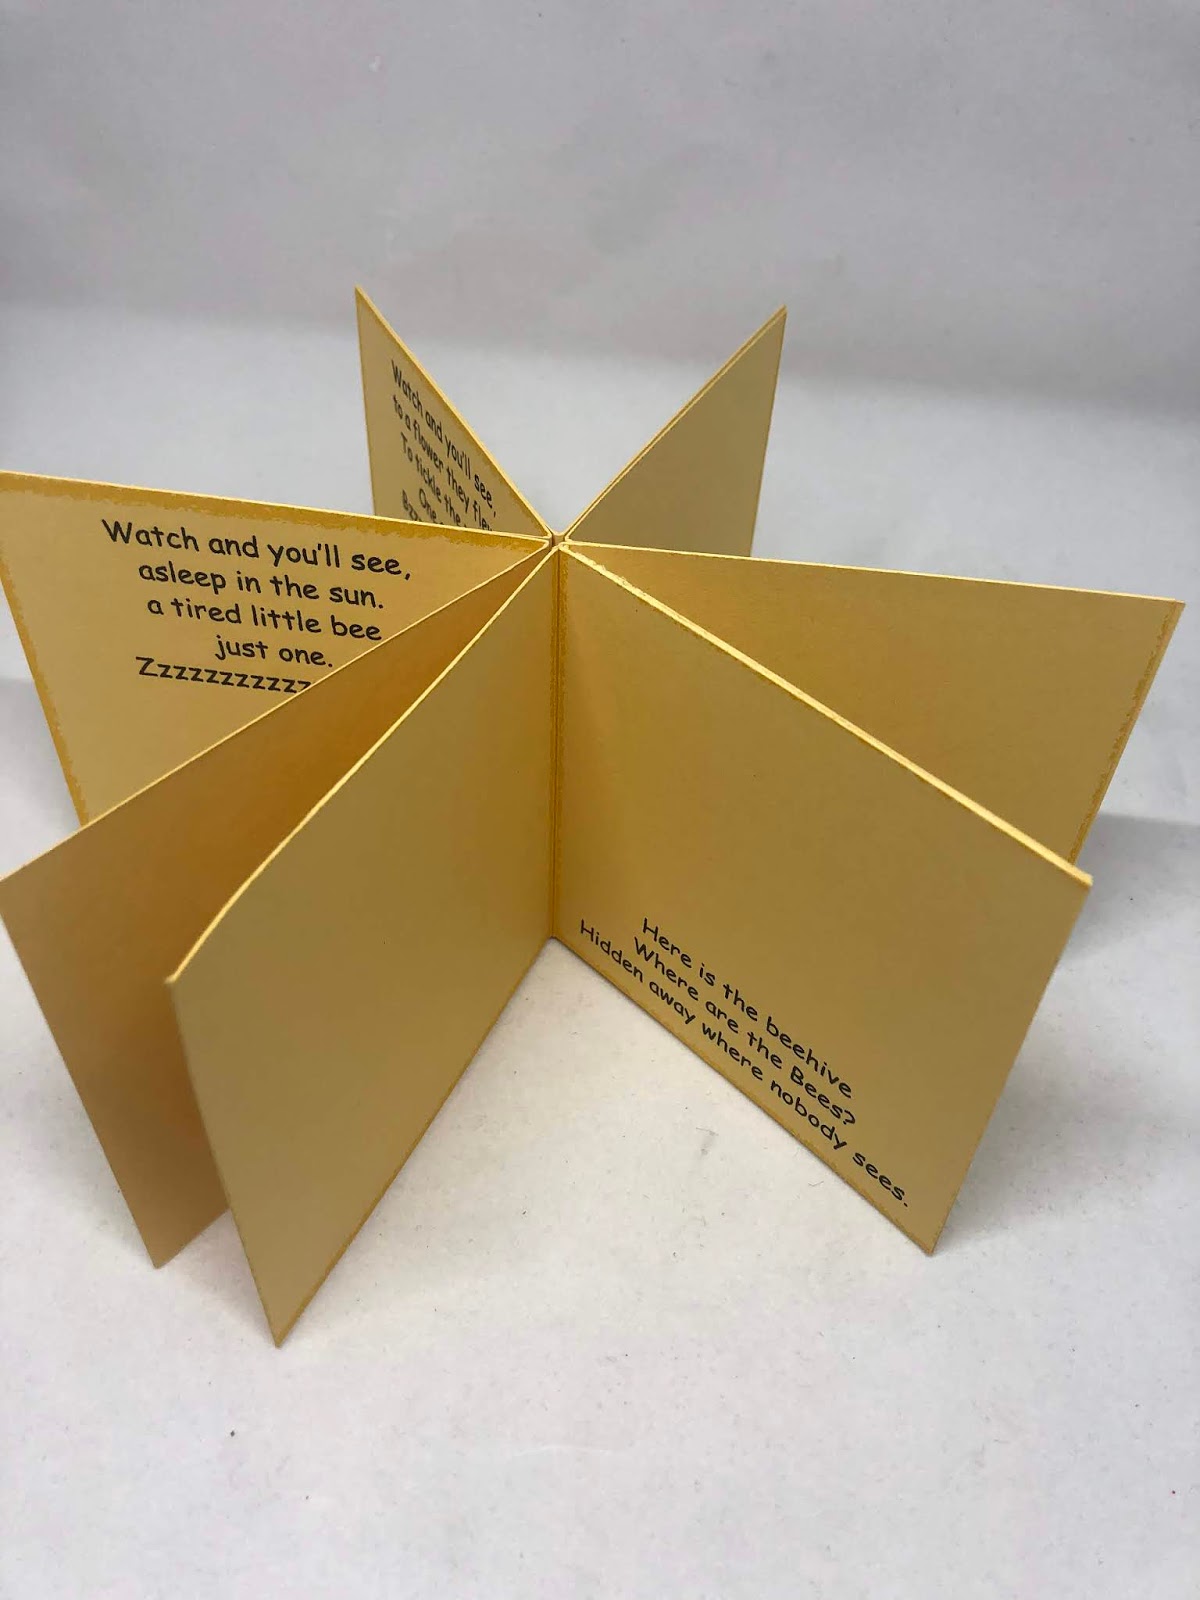
Bee Nursery Rhyme Book - Star Book or Bound

I used the Honey Bee stamp set and Detailed Bee dies and the Golden Honey Speciality Designer Series Papers free with a qualifying purchase with Sale-a-bration.
I used my computer to type up the words to the nursery rhyme as I remember it, but I could not remember how it ended and could not find it anywhere on the internet and so I made up the last two verses myself! (If you would like a PDF copy see how to get one, already the right size and lined up, at the bottom of this post!)
I have outlined each page on my PDF with a yellow frame to make the pages easier to cut out. The pages measure 31/4 inches square and so each double page is 61/2 inches by 31/4.
Decorate the front cover however you like.

To make the Star Book you need to print the written pages onto two separate sheets of cardstock in your printer. Trim to 6.5 inches wide by 3.25 inches deep score in the middle at 3.25 inches. There are 5 of these inside pages. I printed onto Whisper white cardstock ensuring that the print option is set to 'original' size and that the paper is printing on 2 single sided sheets of card. TIP: It is easier to line up by scoring your middle line first.)
Then you will need:
6 x Designer Series paper cut 4 inches deep by 8 inches wide. (fold in middle)
6 x Cardstock cut 4inches deep and 9 inches wide. (fold in middle)
2 x designer series paper for front and back cover 3.5 inches deep x 4 inches wide.
For each double page you will stick some double sided tape onto the back of each end except for the cardstock pieces as these back to back with each other so only one side needs the tape.
Then sandwich all of the cardstock pages to each other. This makes a star.
Wrap a piece of ribbon around the outside of the book and glue you back and front piece of designer series paper over the ribbon holding it in place.
Decorate the pages 5 Bees page is at the start of the post and 3 bees is at the end - here are the remaining decorated pages 4, 2 and 1!

The pages with one and two bees, I used the flowers in the Honey Bee stamp set


This is a different version of the book although it looks like a star below it actually has two cover ends and can fold flat - although you could also have it as a star book!


Below is how I decorate page 3. For this tree page I used the tree die from the Sweet Silhouettes dies.
I have designed the PDF with a roughened yellow frame to aid the cutting process. You actually end up cutting slightly in front of these lines but the best advice is to score the middle line of the pages first and then measure the correct dimensions of 3.25 for each page. The printer may grab your page slightly off when it prints out so the yellow lines will help if this happens. Don't worry if your pages are slightly off the yellow frame as in the photo below - all you have to do is get a sponge dauber and some daffodil delight in and daub the edges so they blend in. (Note the page below is not blended in!)

If would like a printed nursery rhyme book all set up ready to assemble and decorate, there are four versions. One that takes two sheets of cardstock and one that prints on both sides and only takes one sheet of cardstock. I also wrote both versions using two formats, one using words - i.e. one , two, three, four, five. One version uses numbers 1,2,3,4,5. Hence four versions.
To buy all four versions (4 PDF's) the cost is only 99p (GDP) which is $1.29 USD !! (on todays exchange rate) Un BEE liveable value!!
Click my PayPal link below.
Be sure to add your email so I can email them all to you. Also please allow 24 hours for me to send you the email with the PDF as I will be doing this manually and I live in the UK so may need extra time depending on the time difference where you are in the world.
I would love to see your versions - if you make one please hashtag it as #Hereisthebeehive and then I can enjoy looking at your creations.
JoP x
Important Note: By purchasing you agree not to sell these 4 PDF's or share electronically. You may print it out and make books with it and publish what you have made. If you are a demonstrator or a person who runs classes or events you may print out copies for your class participants to use. Just enter your email and press 'add to cart' and the button should take you to PayPal to agree the price and pay. NOTE you can also pay by card following this link.


Comments
Post a Comment
Thank you for taking the time to comment, I appreciate the feedback. Jop x